SSO with Google Workspace
Shelf supports single sign-on (SSO) using Google Workspace (formerly known as GSuite). Enterprise or Organization plan only.

Set Up SSO with Google Workspace
Shelf supports single sign-on (SSO) using Google Workspace (formerly known as GSuite). To set up SSO with Google Workspace, follow these steps:

Step 1: Open the Google Workspace Web and Mobile Apps Console
Navigate to the Google Workspace console.
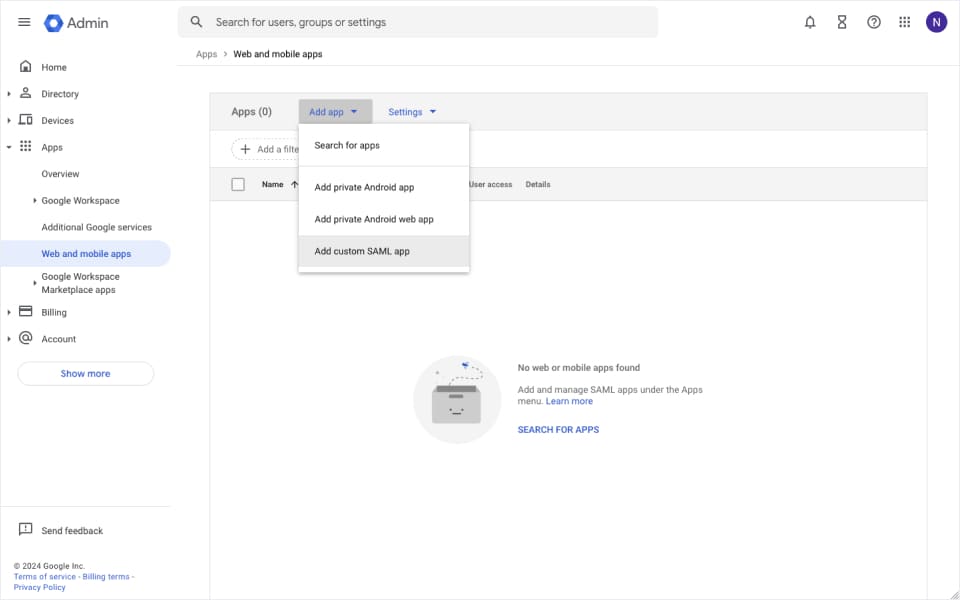
Step 2: Choose "Add custom SAML app"
From the Add app button in the toolbar choose Add custom SAML app.
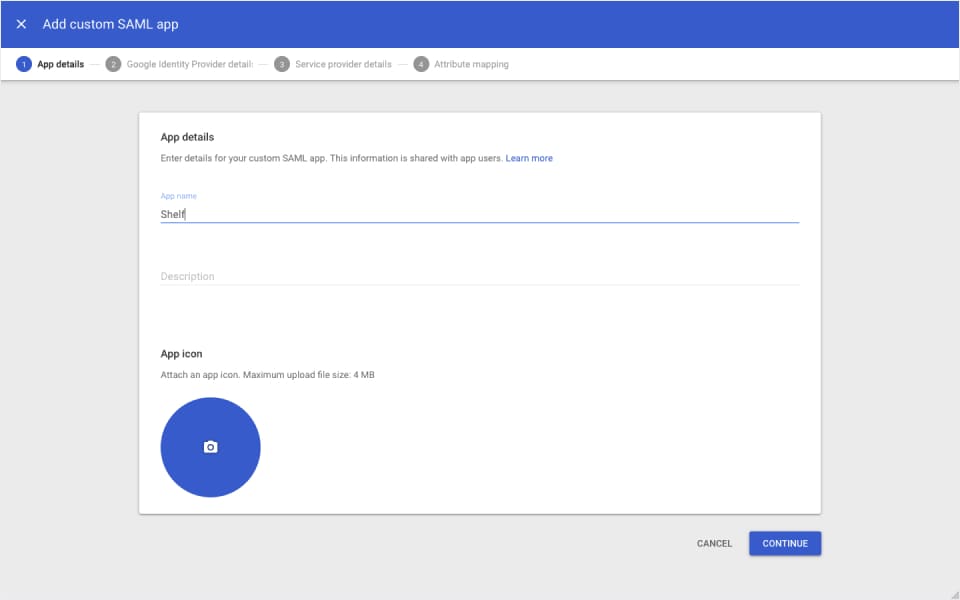
Step 3: Fill Out App Details
The information you enter here is for visibility into your Google Workspace. You can choose any values you like. Optionally enter a description.
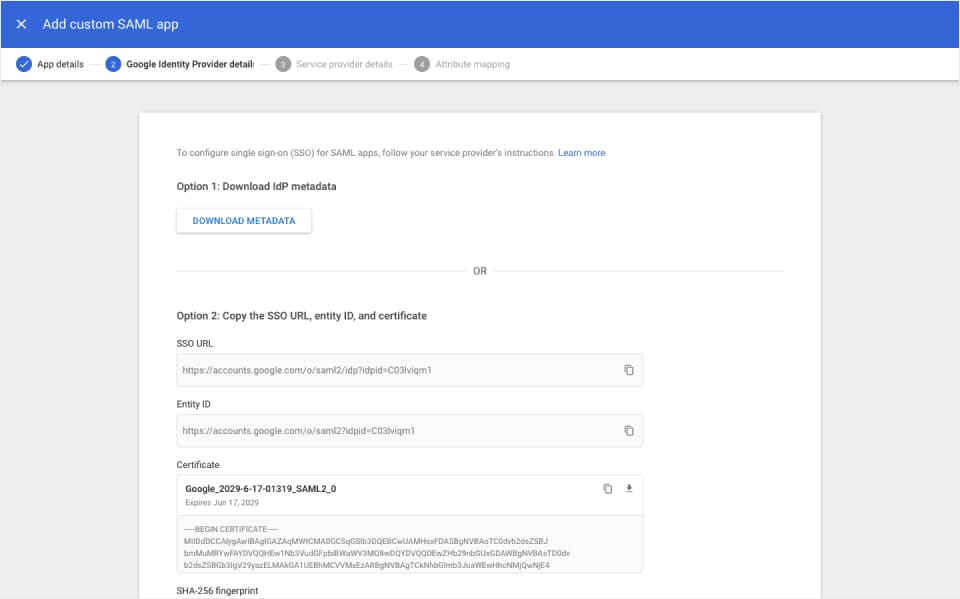
Step 4: Download IdP Metadata
This is a very important step. Click on DOWNLOAD METADATA and save the file that was downloaded.
 It is very important to send this file to your support contact at Shelf to complete the SSO setup process. If you are not sure where to send this file, you can always reach us at hello@shelf.nu.
Important: Check the expiration date of the certificate in the metadata. Ensure there is at least 1 year left before it expires, and mark the date in your calendar to remind yourself to update the certificate without causing downtime for your users.
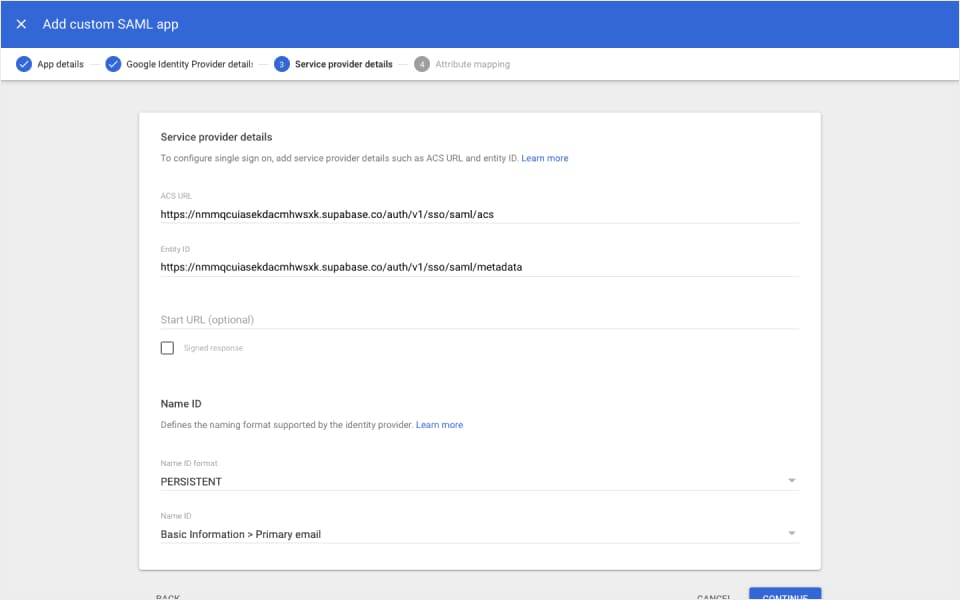
Step 5: Add Service Provider Details
Configure the Service Provider Details on the next screen:
| Detail | Value |
|---|---|
| ACS URL | https://nmmqcuiasekdacmhwsxk.supabase.co/auth/v1/sso/saml/acs |
| Entity ID | https://nmmqcuiasekdacmhwsxk.supabase.co/auth/v1/sso/saml/metadata |
| Name ID format | PERSISTENT |
| Name ID | Basic Information > Primary email |
Step 6: Configure Attribute Mapping
Attribute mappings allow Shelf to get information about your Google Workspace users on each login.
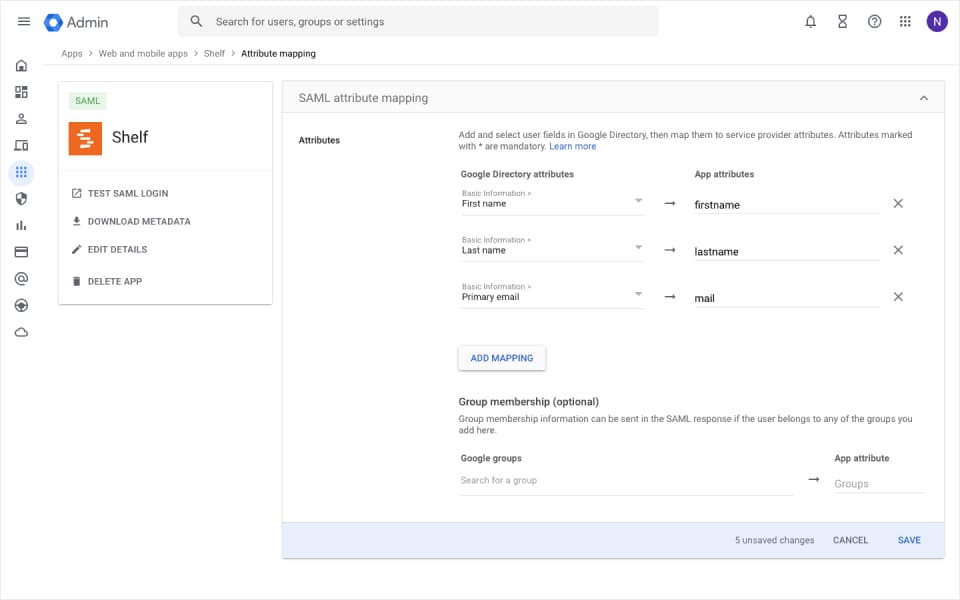 All attribute mappings are required. If in doubt, replicate the same config as shown in the documentation.
NOTE: You will come back to this step at a later stage once you have your groups created and users assigned.
Step 7: Wait for Confirmation
Once you have configured the Google Workspace app as shown above, make sure you send the metadata file you downloaded to your support contact at Shelf.
This information needs to be entered into Shelf before SSO is activated end-to-end.
Wait for confirmation that this information has successfully been added to Shelf. It usually takes 1 business day to configure this information for you.
In the meantime, you can continue with the next steps that will show you how to setup your groups and users.
Step 8: Create Groups and Assign Users
In order to manage which users get access to which workspace and with what role, Shelf uses groups for the mapping. For each workspace you will have to create 2 groups, each one representing a different role in Shelf:
- Admin group
- Self service group
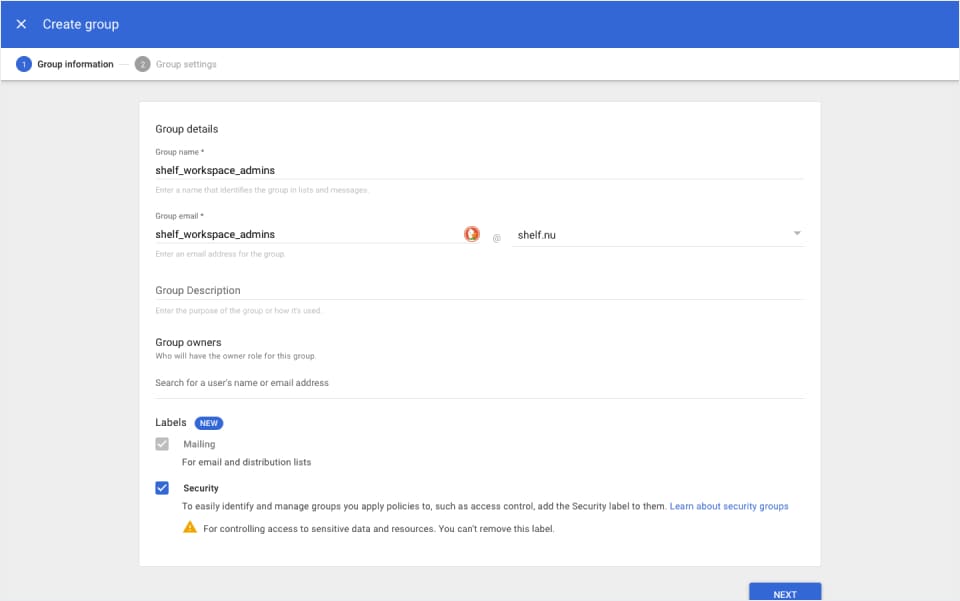
8.1: Create Your Groups in Google Workspace
First step is to create the groups in the Google Workspace. Inside your admin panel, navigate to Directory > Groups > Create group.
Add a name, email and make sure the group is labeled as security. Optionally fill in the other fields as well. Make sure to create 2 groups for each workspace, one for Admins and one for Self service users.
Note: Due to how Google Workspaces works, it returns group names instead of IDs when the user tries to login. We recommend using lower cased group names without spaces, to avoid mismatch. This is not required, but can ensure a better integration.
8.2: Assign Members to Each Group
Assign members to respective groups through your Google Workspace administration panel. Ideally, members should belong to one group within the same workspace. If they are part of both groups, the admin role will take priority.
8.3: Allow Groups Access to Shelf App
Configure Google Workspace user access to grant permission to the Shelf application for selected groups:
- Click on the "User access" card or the down-arrow
- Follow the on-screen instructions
Google system changes might require waiting for at least 15 minutes for full propagation.
8.4: Map Groups to App Attributes
Once you have created all your groups, you have to make sure to add them to the attributes returned by the app.
Make sure to add all groups that you want to access Shelf. The App attribute name should be groups.
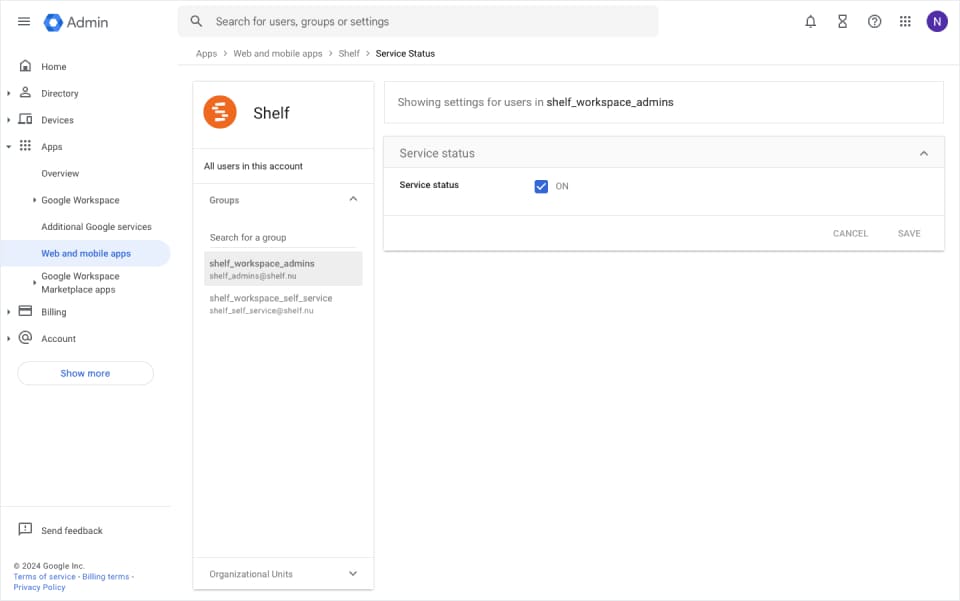
Step 9: Map Google Workspace Groups Inside Shelf
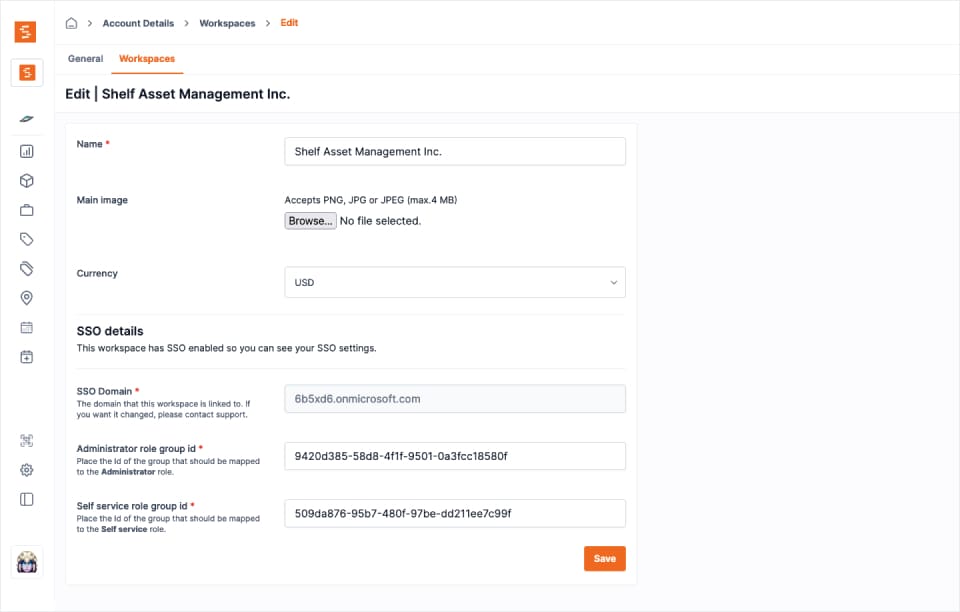
Once you have the groups ready, you need to add their names in the workspace settings inside Shelf. If you have multiple workspaces, you will need to map each one.
 Go to the workspace settings and place the name of the ADMIN and SELF SERVICE groups.
Important: Those fields are case sensitive. The name should be placed exactly as the group name is in Google Workspace.
Step 10: Test Single Sign-On
Once you have completed all the steps above, ask one of those users to help you out in testing the setup.
It often helps to ask them to log out of their Google account and log back in.
Ask them to enter the domain in the Login with SSO page.
If sign in is not working correctly, reach out to your support contact at Shelf.
Personal Workspaces and SSO
When you sign in via SSO, your personal workspace is hidden — you only see the team workspaces your administrator has assigned to you. This ensures SSO-managed users always operate in the correct organizational workspace rather than their personal space.
No Workspace Assigned?
If your SSO account has not been assigned to any team workspace, you will see a "No workspace assigned" page after login.
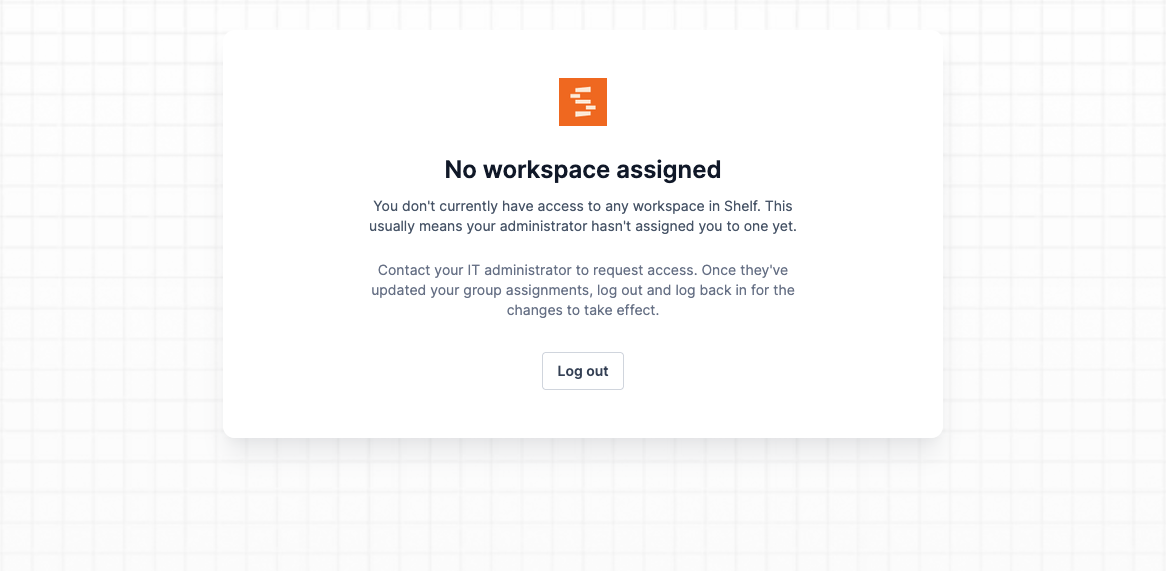
This happens when:
- You've just signed up via SSO for the first time and your administrator hasn't assigned you to a group yet
- Your group access has been revoked by an administrator
What to do: Contact your IT administrator and ask them to assign you to the appropriate workspace group in your identity provider (e.g., Google Workspace). Once assigned, log out and log back in — Shelf will redirect you to your workspace automatically.
Note: Your personal workspace still exists in the background, but it is not accessible while you are signed in via SSO.
Setting a Custom Display Name (SSO Users)
When you sign in via SSO, Shelf uses the first and last name provided by your identity provider (e.g., Google Workspace). If you want a different name to appear throughout the platform — in bookings, notes, audit reports, and team pages — you can set a custom Display Name.
How to Set Your Display Name
- Navigate to Account Settings (click your avatar in the top right)
- Go to the General tab
- Find the Display Name card
- Enter your preferred display name and save
Your display name will override your SSO-provided name everywhere it appears in Shelf: booking custodian labels, asset notes, audit PDFs, and the team users page.
Note: The Display Name card is only shown for SSO users. Users who signed up with email/password manage their name through the standard first name and last name fields.
Display Name on the Team Page
Workspace administrators can see SSO users' display names on the Team page. Display names appear in brackets next to the SSO-provided name, making it easy to identify who has customized their display.
SSO in the Shelf Companion Mobile App
Single sign-on works in the Shelf Companion app too, on both iPhone and Android. When you tap Sign in, the app opens your organization's SSO flow in a secure in-app browser — the same login screen you use on the web. Your identity provider handles the password, one-time code, and any multi-factor step, then returns you to the app signed in. No separate mobile credentials are needed.
This means SSO-managed field teams can scan, run audits, manage custody, and handle booking check-in/check-out from their phones using the same single sign-on the organization already requires. See Getting Started with Shelf Companion for the full mobile sign-in walkthrough.
Ready to try Shelf?
Put what you're learning into practice. Free plan available — no credit card required.