

Advanced Asset Index: Complete Guide
The advanced asset index in Shelf provides powerful ways to view, filter, sort, and manage your assets. This guide covers how to enable it, all the features, and best practices.

The Advanced Asset Index gives you powerful ways to filter, sort, customize columns, and act on assets in bulk. This guide covers how to enable it, every feature, and common workflows.
Enabling the Advanced Index
The Advanced Asset Index is a beta feature you enable per-workspace.
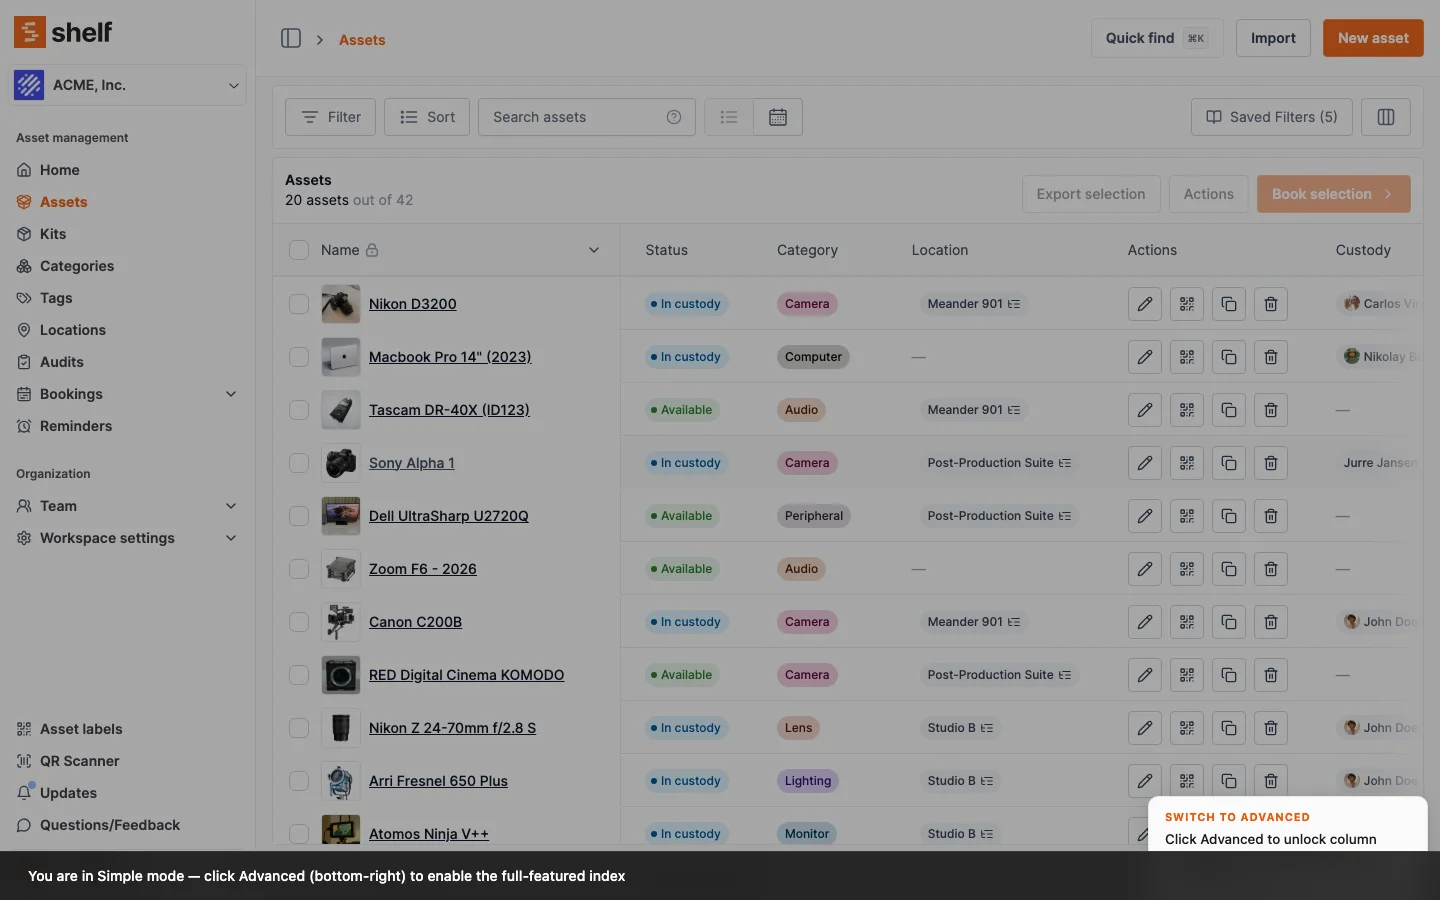
- Navigate to the Assets index and locate the Advanced (beta) button in the lower-right corner
- Click the button to accept the beta flag — there's no risk, you can toggle back to simple mode at any time
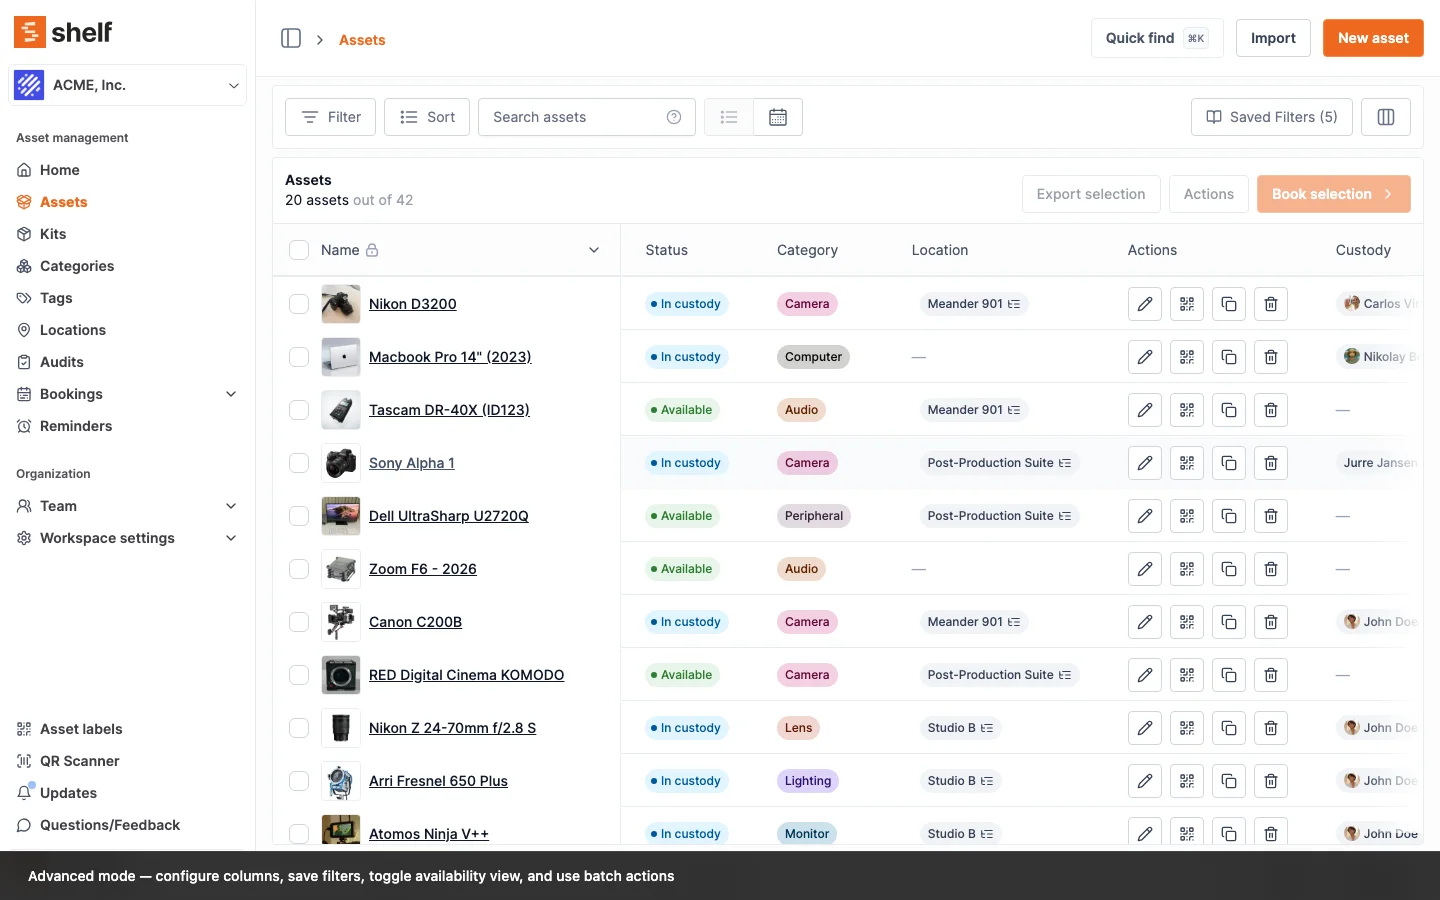
- You're done — the advanced features become available immediately
On a phone, advanced mode steps aside. Below tablet width the index says "Advanced mode is currently not available on mobile" and offers a Change to simple mode button. The setting is per workspace, so switching to simple on your phone switches it on your desktop too. Simple mode is the one to use on a small screen; everything in this guide is a desktop or tablet feature.
Feedback and requests: the team welcomes suggestions about batch actions, column configuration, and filters. Email hello@shelf.nu or contact your account manager.
Managing Your View
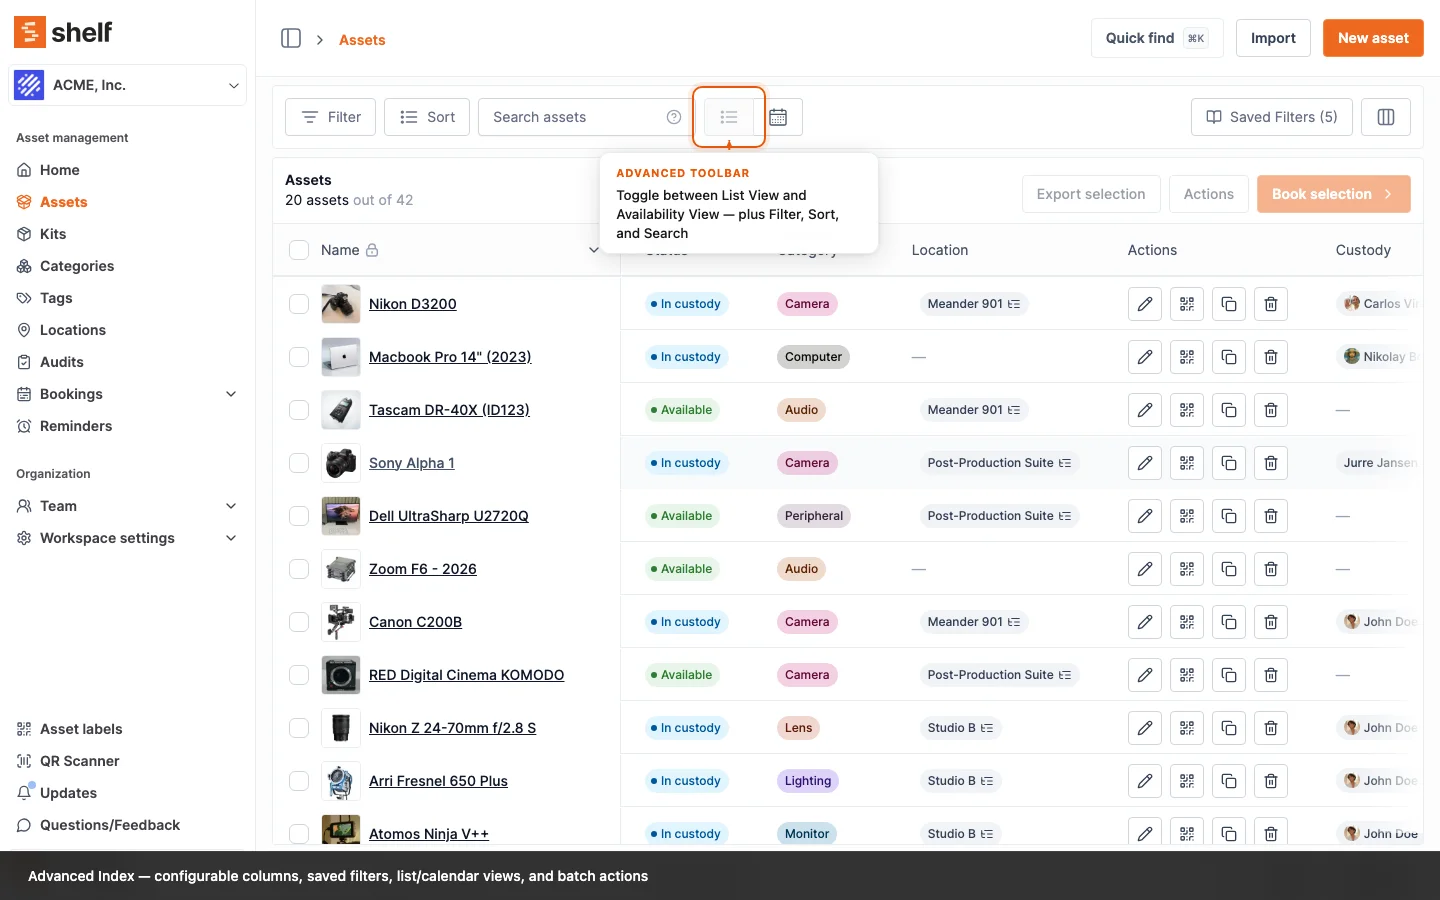
Columns Management
- Fixed column: "Name" is always visible
- Toggle any available columns including custom fields
- Use drag handles to reorder columns
- "Select all" or "Deselect all" for quick configuration
Pro tip: Show only necessary columns for your current task to maintain a clean view.
Every Column You Can Show
Name is fixed and always first. Everything below it can be switched on or off and dragged into the order you want. The Shown by default column is what a brand-new workspace starts with, not a limit: switch any of them on whenever you need it.
| Column | Shown by default | What it holds |
|---|---|---|
| Asset ID | Yes | The workspace's own sequential ID, SAM-0017 style |
| QR ID | Yes | The ID printed on the Shelf QR label |
| Status | Yes | Available, In custody, Checked out |
| Description | Yes | Truncated to fit the row |
| Value | Yes | Per-unit value. On a pooled asset this is the value of one unit, not the stock |
| Available to book | Yes | Whether the asset can go on a booking at all |
| Created at | Yes | When the asset record was made |
| Updated at | Yes | Last change to the record |
| Category | Yes | One category per asset |
| Tags | Yes | Two shown, the rest behind +N |
| Location | Yes | Where the asset is. Pooled stock can sit in several, so this can overflow |
| Kit | Yes | The kit the asset belongs to |
| Custody | Yes | Who is holding it |
| Upcoming Reminder | Yes | The next asset reminder due |
| Upcoming Bookings | Yes | Bookings this asset is committed to |
| Actions | Yes | The per-row menu |
| ID | No | Shelf's internal record ID, the one the bulk update flow matches rows on |
| Quantity | No | Units held, for quantity-tracked assets |
| Min quantity | No | The low-stock threshold |
| Tracking method | No | Individually tracked or quantity-tracked |
| Asset model | No | The asset model the unit belongs to |
| Code128, Code39, DataMatrix, External QR, EAN-13 | Yes, when barcodes are on | One column per barcode type. See Alternative Barcodes |
| Your custom fields | Added switched on | One column per active field you have defined |
The five barcode columns only exist once Alternative Barcodes is enabled on the workspace. They are added switched on, so they appear the first time you look after enabling.
Custom-field columns follow the same rule and follow the field itself. Creating an active field adds its column for everyone, switched on; deactivating the field removes the column again; reactivating or renaming it keeps whatever visibility and position you had chosen. A field created as inactive gets no column until you activate it. See Adding Additional Fields to Assets.
Total value is not in this list, and that is on purpose. It is written into CSV exports as a separate column, so a pooled asset's per-unit Value and its total both reach the spreadsheet, but it is not a column you can put on screen. See Exporting Data from Shelf.
When a Cell Holds More Than It Can Show
A table cell sets the height of its row, so a cell that stacked everything it held would stretch every other column in that row with it. Columns that can hold several values cap what they render on one line and collapse the rest into a small +N control:
- Tags and the five barcode columns show two, then
+N - Location, Kit and Custody show the primary one, then
+N
Hover or tab to a +N and it lists what is hidden. On a barcode column it does more than that: clicking +N opens the code preview on the first hidden barcode, and the dialog's own selector reaches the rest, so a code past the cap is still one click from being displayed large enough to scan off the screen.
This is why a row stays the same height whether an asset carries one barcode or six.
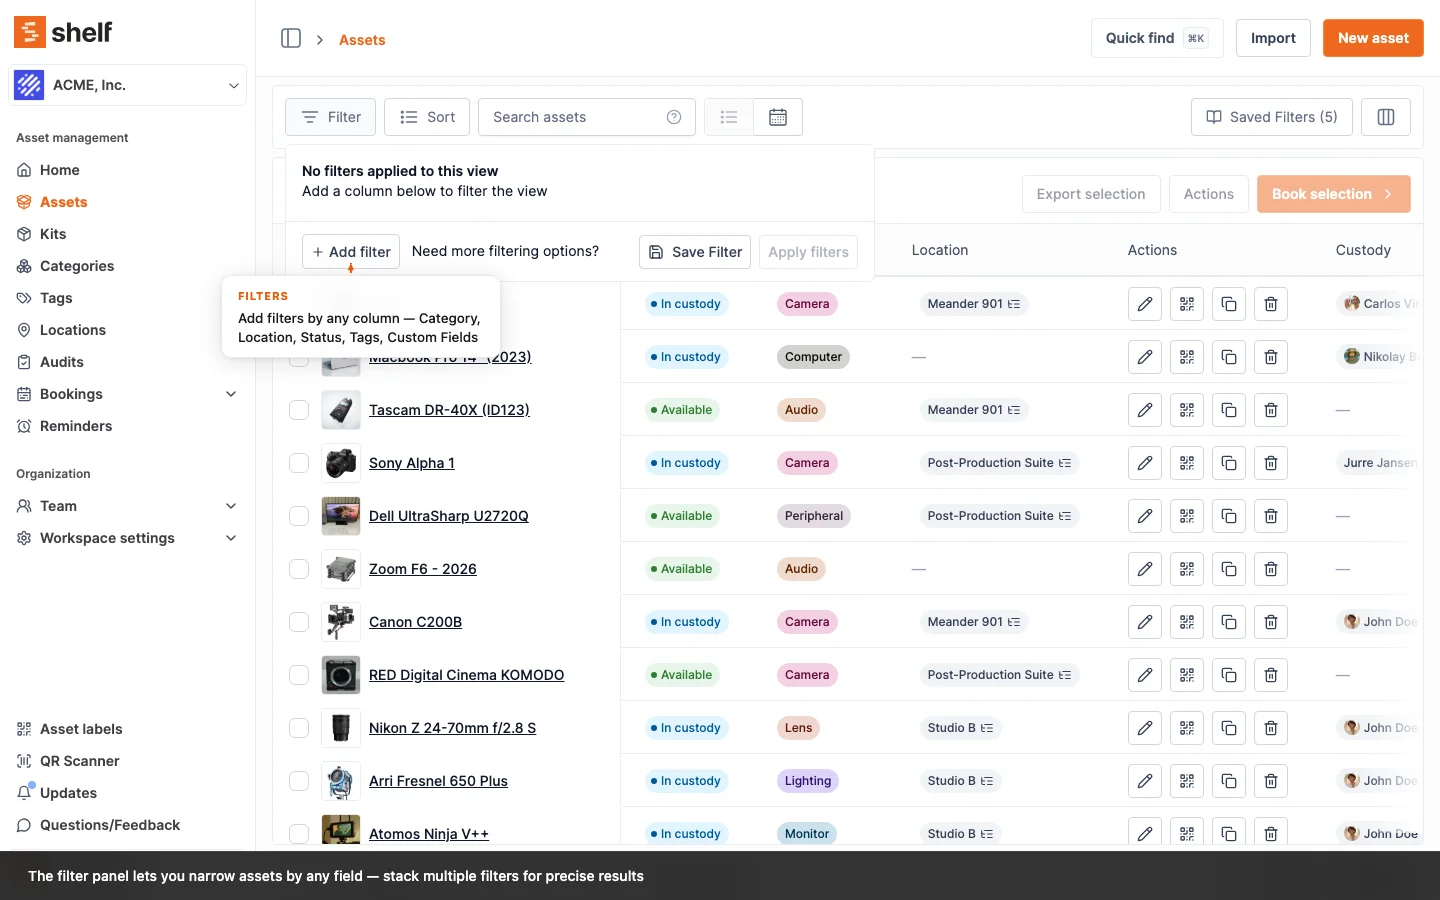
Advanced Filtering System
Text Fields (Name, Category, Location, etc.)
- is: Exact match (e.g.,
Location is "Server Room") - Is in (incl. sub-locations): Location only. Matches the location you pick and every location under it. Plain is matches the one location and nothing below it. See Sublocations
- is not: Excludes exact match (e.g.,
Category is not "Computers") - contains: Partial match (e.g.,
Description contains "wireless") - matches any: Multiple exact matches
- contains any: Multiple partial matches
Number Fields (Value)
- is: Exact value (e.g.,
Value is 1200) - is not: Excludes value
- greater than: Above value (e.g.,
Value greater than 5000) - less than: Below value
- greater or equal: Minimum value
- lower or equal: Maximum value
- between: Value range (e.g.,
Value between 1000 and 5000)
Date Fields (Created At, Purchase Date, etc.)
- is: Specific date
- is not: Exclude date
- before: Before date
- after: After date
- between: Date range
- in dates: Multiple specific dates
Boolean Fields (Available to Book, Is Portable)
- is: Yes/No selection
Tags
- contains: Has specific tag
- contains all: Has all specified tags
- contains any: Has any of specified tags
Low stock only
The Filter panel carries a single checkbox, Low stock only (at or below reorder threshold), just above the Add filter row. It narrows the list to quantity-tracked assets whose available count has reached or fallen below their Min quantity, and it applies immediately rather than waiting for Apply filters.
It stacks with everything else, so you can combine it with a location or category filter to see what a single stockroom needs. It also counts toward the filter badge on the Filter button and clears with Clear all. Add Min quantity from the column picker to see each item's threshold next to its live count.
Saved Filters
A filter you use often can be saved and reused. Saved filters are part of the advanced index only.
Saving a filter
- Open Filter and build the filter you want.
- Click Apply filters.
- Click Save Filter. It sits next to Apply filters in the same panel. It is greyed out until the filter is applied, and hovering it tells you so.
- Type a name and click Save.
A saved filter stores your filters and your sort order. It does not store your columns. Columns stay a separate setting.
Using a saved filter
Click Saved Filters at the top right of the asset list and pick a name. The button shows how many you have saved. The list has a search box, and a check mark marks the filter you are looking at now.
Each row in the list carries three controls:
- The star moves the filter into a Starred group at the top of the list
- Rename gives it a new name
- Delete removes it, after Shelf asks you to confirm
Rename and Delete appear when you hover the row.
You can keep 20 saved filters. The count is per person, per workspace. At 20, Save Filter stays greyed out until you delete one. Two of your saved filters cannot share a name.
Saved filters are personal
A saved filter belongs to the person who made it. Your colleagues do not see it, and you do not see theirs.
To give a colleague the same view, apply the filter, copy the page address from your browser, and send it to them. The address carries the whole filter. A location travels as its own ID, so the link opens on the same location for everyone in the workspace. Your colleague opens the link and clicks Save Filter to keep a copy.
Shelf remembers your last filter
Shelf remembers the last filter you applied in each workspace. It keeps that in the browser you were using, so the list opens on the same filter the next time you come back. Open Shelf in a different browser or on a different computer and the list starts with no filter.
Asset Model View
If your workspace groups identical units under Asset Models, the index can list the models instead of the assets. Click the cube icon beside the list and calendar icons in the toolbar (its tooltip reads Asset model view). The button appears in advanced mode only.
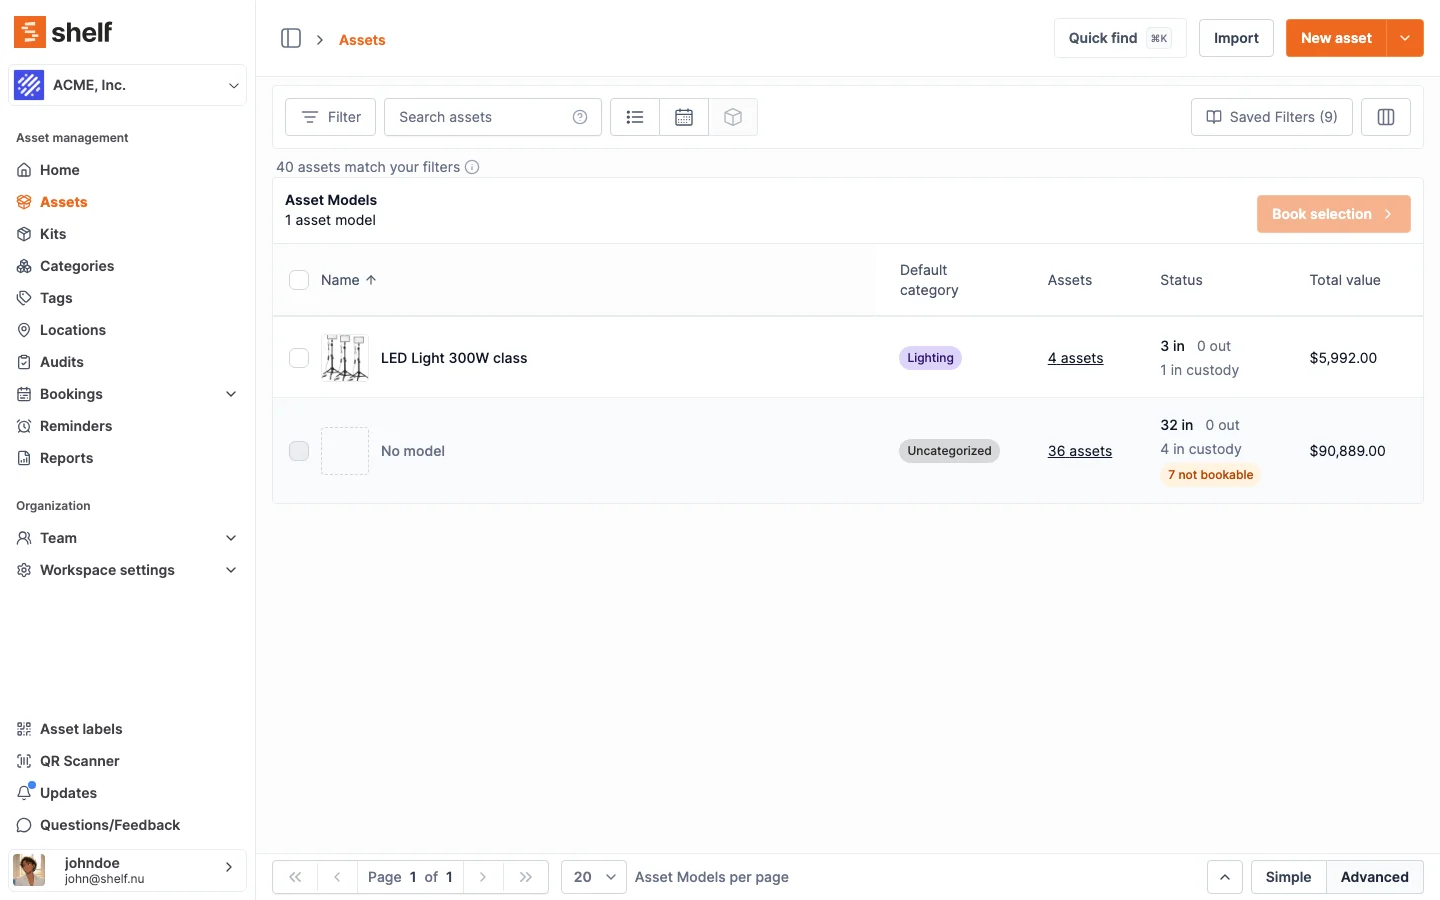
Each row is one model:
- Name, with the model's picture
- Default category: the category the model gives a new unit. Units can have been moved to other categories since, so this is the model's default, not a count of where its units sit
- Assets: how many of the assets matching your filters carry the model
- Status: where those assets are right now, as in, out and in custody. The three add up to the row's asset count. An orange N not bookable chip counts the ones with Available for bookings switched off. It overlaps the other three rather than adding to them
- Total value of those assets
The counts follow your filters. Every filter, saved filter and search term applies to this view exactly as it does to the list. The one exception is the Low stock only quick filter: it only concerns quantity-tracked assets, which this view does not count, so switching to the model view clears it. Filter to one location and the view answers "which models do I have here, and how many". A search term matches model names as well as everything else the search covers, so typing Dell Latitude lists that model with its real counts. The line above the table states it, for example "40 assets match your filters".
Quantity-tracked assets are not counted. Asset models group individually tracked units only, so for the same filters the model view can show fewer assets than the list view. The info icon beside the count says so.
Assets without a model are gathered in a No model row, always last. They count toward the asset total but not toward the number of models in the header. That row is a good place to start grouping a fleet: open it, click View all in list, select the units, then use Actions → Update asset model (see Grouping a Fleet into an Asset Model). A workspace with no models yet gets a line saying so, with a link to create one for the roles that can.
Click Name, Assets, Status (which sorts by the "in" count) or Total value to sort. Switching between the list, availability and model views starts you on page 1, because the pages list different things.
Seeing the assets behind a count
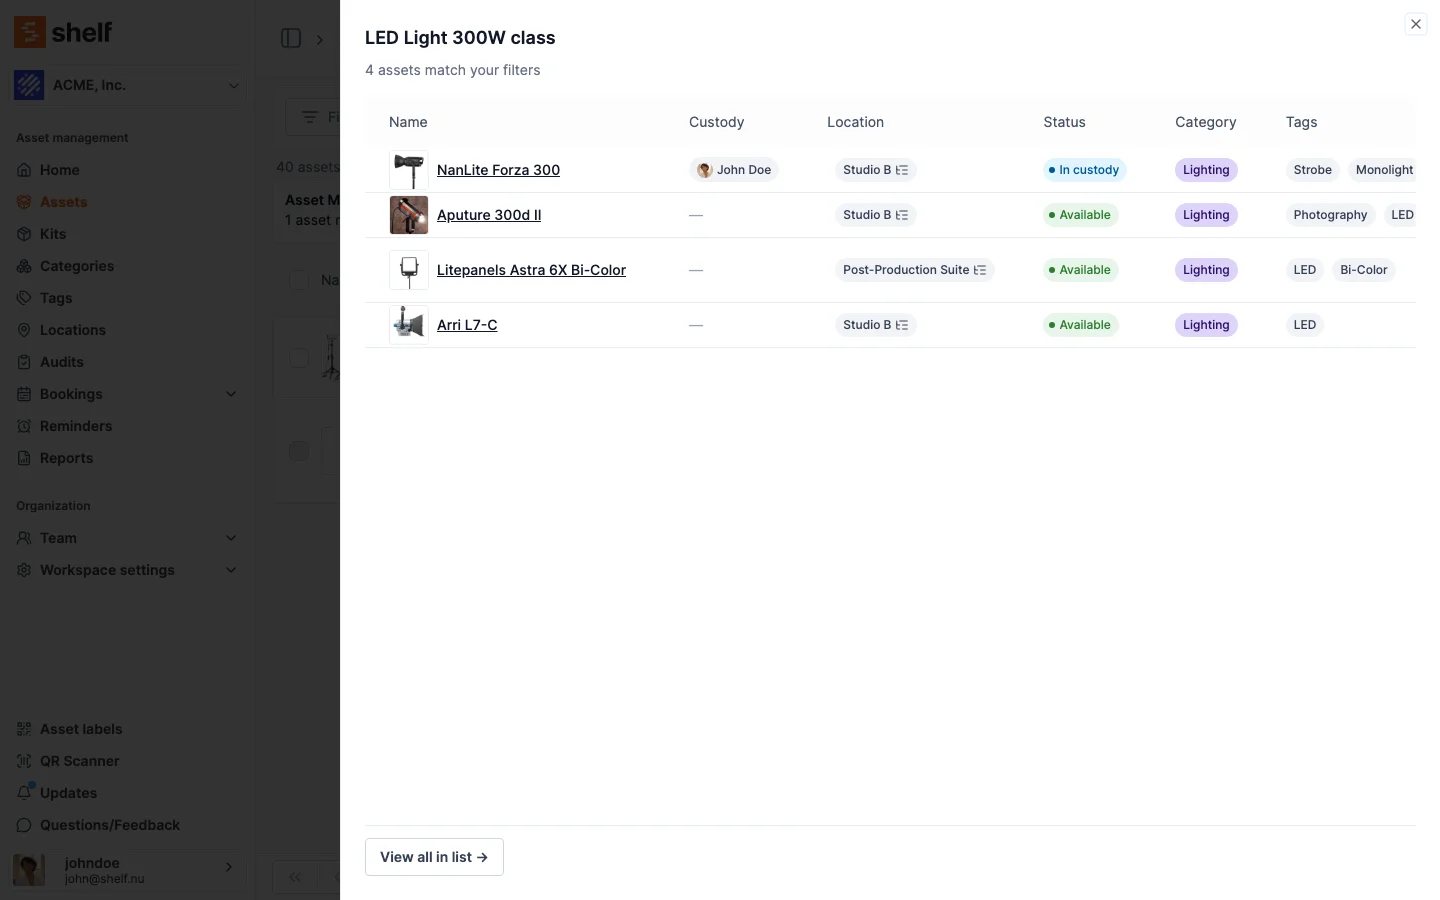
Click a row's count, such as 4 assets, and a side panel lists those assets with the columns you have set up for the list. It shows the same assets the count was made from, filters included. The panel loads one page; when more assets matched, it says "Showing first N of M assets matching your filters". The panel's column headers stay in place while you scroll a long list in either direction. When none of the model's assets match your filters, the panel says how many sit outside them, for example "None match your filters. This model has 52 assets outside them." View all in list → opens the regular list filtered to that model (or to assets with no model), with your other filters kept.
Booking by model from the index
Tick one or more model rows and click Book selection:
- Create new booking opens the booking form (name, dates, custodian, description and tags) with a row for each selected model and an Add box for how many units to reserve. Once both dates are set, each row shows how many units of that model are free in that window, for example "adding 2 → 2 of 8 available"; before both dates are set there is no window to measure, so no figure is shown. Confirm creates a Draft booking that holds those model reservations without naming any units yet, and opens its overview. Reserve it as you would any other booking, then settle the reservations with real units at pickup.
- Add to existing lets you pick an open booking (Draft, Reserved, Ongoing or Overdue) and reserve units of each selected model on it. The booking list opens on the bookings that have not ended yet, soonest first, with finished bookings after them, most recently finished first. Once you pick the booking, every row shows what you are adding against what is free for that booking's dates, for example "2 already reserved · adding 1 → 3 of 8 available". Click Reserve.
If a model's pool cannot cover the number you ask for in that window, nothing is reserved and Shelf says so under the title Not enough units, for example "Cannot reserve 4 × Dell Latitude 5550. Only 2 can be reserved in this window."
The No model row cannot be selected, since there is no model to reserve units of, and there is no "select all" across pages: a reservation needs a number per model, so you pick the models in front of you. Book selection is shown to roles that can create bookings, and not in a personal workspace, which has no bookings.
Natural and Advanced Sorting
Natural Sorting
The system uses natural sorting for logical number ordering:
Traditional Sorting:
- Scanner 1
- Scanner 10
- Scanner 11
- Scanner 2
- Scanner 3
Natural Sorting (Shelf):
- Scanner 1
- Scanner 2
- Scanner 3
- Scanner 10
- Scanner 11
Benefits:
- Numbers sort logically within names
- Equipment series appear in proper order
- Serial numbers sort correctly
- Case-insensitive ordering
Multi-Field (Stacked) Sorting
You can build complex sort orders:
- Primary sort sets main grouping
- Secondary sort organizes within groups
- Additional sorts provide final ordering
Example: Sort by Category, then Value, then Name:
Computers
  - Laptop ($2,000) - "Dell XPS"
  - Laptop ($1,500) - "HP Elite"
  - Desktop ($1,200) - "iMac"

Networking
  - Switch ($5,500) - "Cisco"
  - Router ($350) - "Netgear"
  - Access Point ($180) - "Ubiquiti"
Batch Actions
Custody Management
- Release custody from multiple assets
- Assign new custodian to selection
- Perfect for employee offboarding/onboarding
Tag Operations
- Add tags to multiple assets
- Remove tags from selection
- Great for categorization updates
Location and Category Updates
- Move multiple assets to new location
- Update category for selected assets
- Useful for department reorganization
Availability Control
- Mark multiple assets as available/unavailable
- Helpful for maintenance periods
Export Capabilities
Select the assets you want (or Select all X entries to take the whole filtered set), click Export selection, and choose how the file is built:
- Format: Standard for a readable spreadsheet, or Import-ready for a file that uploads straight back into another workspace via Assets → Import
- Columns: only the columns currently visible in your index, or all of them
A Standard export is perfect for:
- Inventory reports
- Audit preparation
- Budget planning
- Maintenance schedules
Full reference: Exporting Data from Shelf.
Practical Examples
Equipment Relocation
- Filter: Location is "Floor 2"
- Select all filtered assets
- Batch action: Update location to "Floor 3"
- Export selection for move documentation
Maintenance Planning
- Filter: Last maintenance before 2023-12-31
- Sort by: Category, Location
- Add tag "maintenance-due-2024"
- Export for service scheduling
Value Assessment
- Filter: Value greater than 5000
- Sort by: Category, Value (descending)
- Export selection for insurance update
Department Transfer
- Filter: Custody is "Marketing Team"
- Sort by: Category, Name
- Batch update: New location and custody
- Export for handover documentation
Best Practices
Efficient Filtering
- Start with broad filters
- Add specific filters to narrow results
- Use date ranges for time-sensitive queries
- Combine filters for precise results
Column Management
- Show only necessary columns
- Order by importance left to right
- Add all needed columns before exporting
Sorting Strategy
- Choose primary sort for main grouping
- Add supporting sorts for subgroups
- Use Name as final sort for easy scanning
Batch Operations
- Filter precisely before selecting
- Verify selection before applying actions
- Export before and after major changes
- Use consistent tag naming for tracking
Tips and Tricks
- Use
containsfor flexible text matching - Combine date and value filters for precise queries
- Export filtered views for reporting
- Use tags for temporary grouping
- Regular column setup saves time
- Stack sorts for logical grouping
- Use natural sorting for numbered items
- Export before batch updates for backup
Troubleshooting
No Results?
- Check filter spelling
- Try broader criteria
- Verify date formats (YYYY-MM-DD)
- Remove some filters temporarily
Too Many Results?
- Add more specific filters
- Combine multiple filter types
- Use exact matches instead of contains
- Add date ranges to narrow scope
Performance Issues?
- Reduce visible columns
- Remove unused filters
- Clear filters after use
- Export large datasets instead of viewing
Export Issues?
- Verify column selection
- Check filter combinations
- Ensure reasonable dataset size
- Confirm file permissions
Need more help? Contact support at hello@shelf.nu.
Ready to try Shelf?
Put what you're learning into practice. Free plan available — no credit card required.