Exporting Data from Shelf
Export asset data from Shelf as CSV — selected assets, filtered results, or a full workspace backup. Covers what's included, when to use each method, and common reporting scenarios.

Shelf provides multiple ways to export asset data as CSV — whether you need a selection of items, a filtered view, or a full workspace backup. This guide covers all three methods, what each includes, and the reporting scenarios they're best for.
Three Export Methods
1. Export Selected Assets
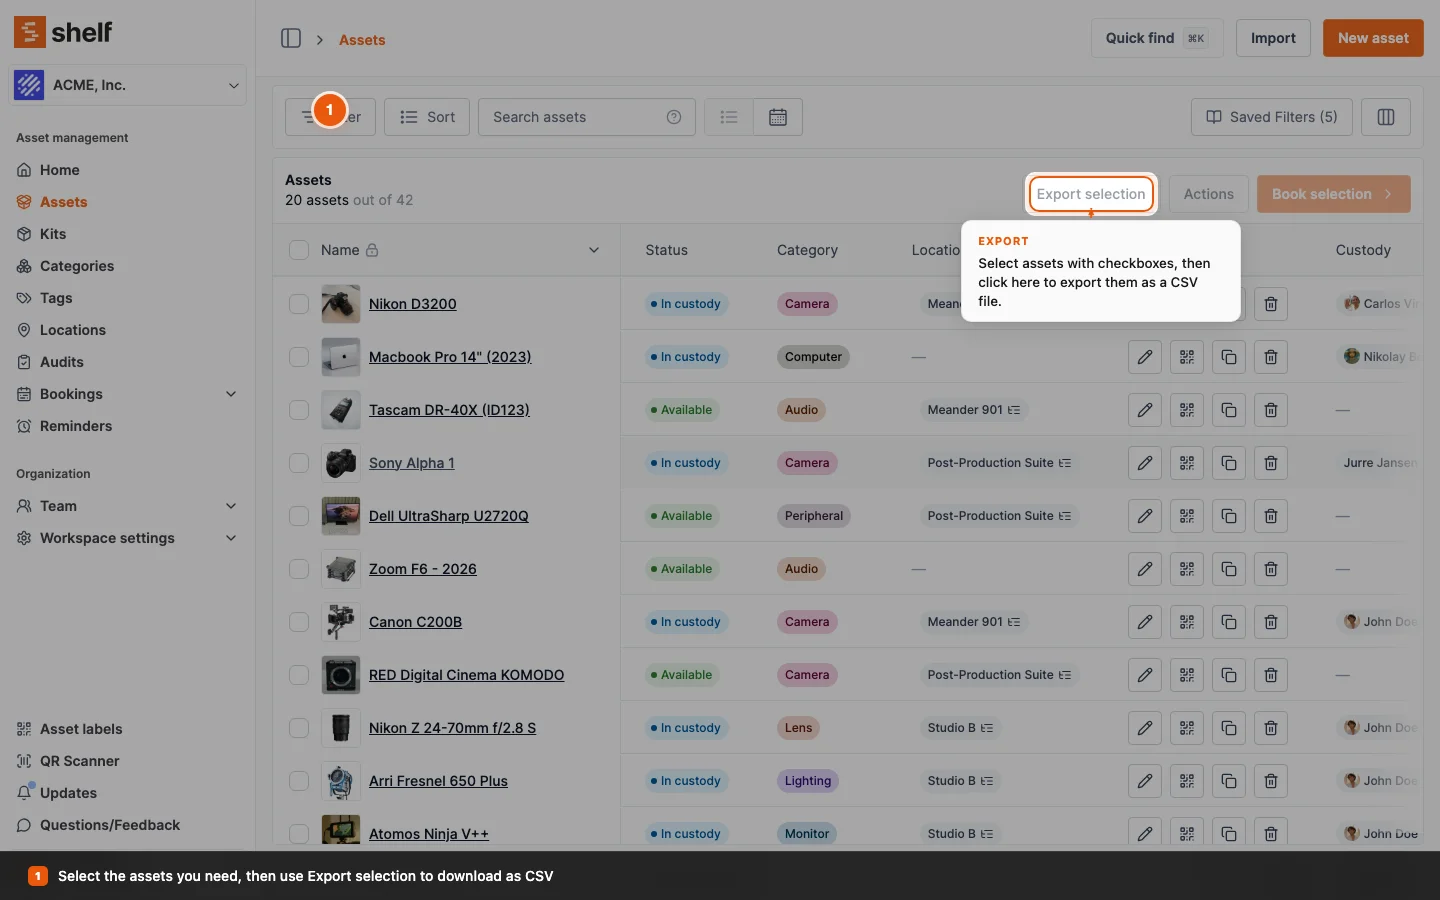
- Navigate to the Assets index
- Select the assets you want using the checkboxes
- Click Export selection at the top of the asset list
- Your selected assets download as a CSV file
2. Export a Filtered View
- Apply any filters in the Assets index (category, location, custodian, tags, status)
- Click Select all X entries to include all matches across every page
- Click Export selection to download the filtered CSV
Filter-then-export is the most common reporting path — see Common reporting scenarios below. For the full filtering reference, see Advanced Asset Index: Complete Guide.
3. Workspace Backup (full export)
- Go to Workspace Settings → General
- Click Download CSV to get a complete backup of every asset in the workspace
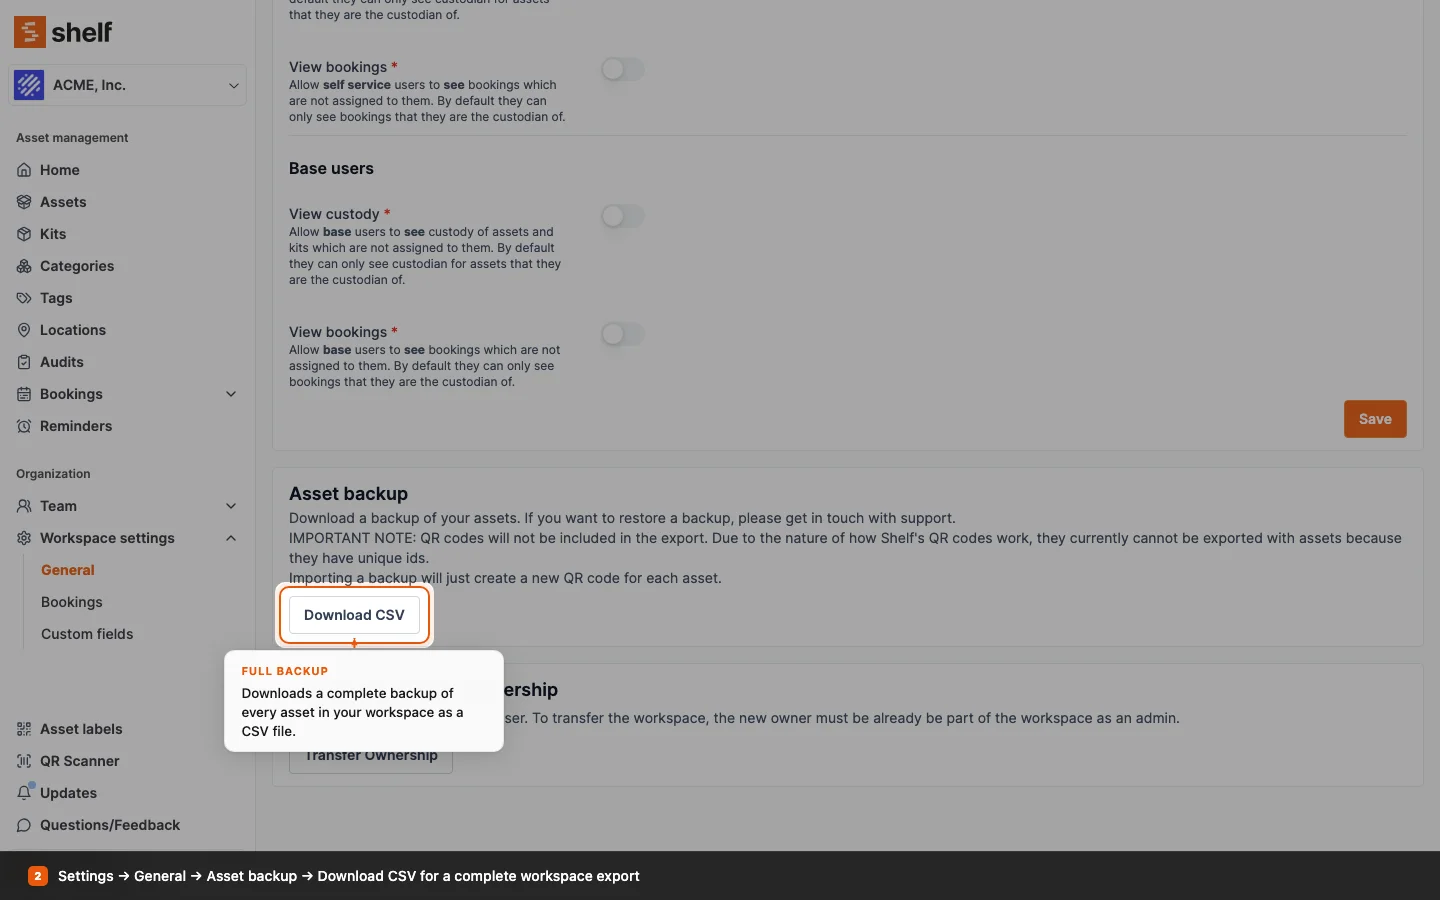
Important: QR codes are not included in the backup. Shelf's QR codes are tied to unique system IDs — if you restore a backup, the system issues new QR codes for the restored assets. Contact support if you need a full restoration.
What's Included in Each Export
Selected and filtered exports include the columns currently visible in your view. Customize the columns by clicking the Columns control in the top-right and toggling which fields display.
Typical fields included:
- Name, Description, Category, Tags, Location
- Status (Available, In custody, etc.)
- Custody (the current custodian)
- QR ID and Asset ID / SAM ID
- Value, Purchase date, any other custom fields you've defined
- Activity history (on selected exports; not on filtered views)
The workspace backup is broader and includes internal fields not intended for re-import.
Common Reporting Scenarios
Assets assigned to a specific custodian
- Click Filter → choose Custody → pick the person
- Select all filtered results
- Export selection
Useful for offboarding reports, asset recovery after a role change, or quarterly accountability reviews.
All assets in a given category
- Filter → Category → pick the category
- Select all → Export selection
Useful for category-level financial reporting or insurance documentation.
Available assets in a specific location
- Filter → Status =
AvailableAND Location = the site - Select all → Export selection
Useful for what-can-I-pick-up-today snapshots for teams planning on-site work.
Assets due for maintenance
- If you track maintenance dates in a custom field, filter by that field
- Alternatively, use tags (e.g.
needs-service) and filter by tag - Export the list to drive a maintenance schedule
See Asset Reminders for setting up recurring maintenance notifications alongside your exports.
Using Exports for Bulk Updates
A common workflow: export a filtered selection, edit the CSV in Excel or Google Sheets, re-import to apply changes at scale. The Update Existing Assets feature handles this with a preview step that shows every field change before anything is saved.
Important: Only use Asset Index exports for re-import updates — not the Workspace Backup CSV. Backup exports include internal fields not intended for re-import, and uploading one as an update file can corrupt data.
Full walkthrough: Bulk Updating Assets via CSV.
Troubleshooting
Getting unexpected results when filtering?
- Check for conflicting filters applied simultaneously
- When filtering by custodian, remember registered users and Non-Registered Members (NRMs) are handled separately
- Clear all filters and re-apply one at a time if results look wrong
Export missing columns you expect?
- Click the Columns control and verify the fields you want are enabled
- Reorder columns before exporting — the CSV respects the current display order
Too much data to export at once?
- Narrow with filters before selecting
- Export by location or category in separate passes
Exporting Other Data Types
- Bookings — separate export flow. See Exporting Booking Information.
- Audits — export as PDF or CSV from the audit detail page (covered in the audit feature docs).
- Team members — the Team page has its own export option for user lists.
Related Articles
- Advanced Asset Index: Complete Guide — full filtering, sorting, and column reference
- Bulk Updating Assets via CSV — export + edit + re-import workflow
- Importing Assets to Shelf: CSV Guide — the import side of the same workflow
- Using Batch Actions in Shelf — bulk changes without exporting
Ready to try Shelf?
Put what you're learning into practice. Free plan available — no credit card required.