Partial Check-ins: Efficiently Handle Incomplete Returns
Partial check-ins in Shelf allow you to process asset returns flexibly, even when not all items from a booking are returned at once.

What Are Partial Check-ins?
When someone returns only some of the assets from their booking, partial check-ins let you:
- Check in available assets immediately without waiting for missing items
- Keep bookings active until all assets are returned
- Maintain accurate inventory status with context-aware asset states
- Track which assets are still outstanding with real-time progress monitoring
- Handle complex multi-booking scenarios where assets exist in multiple bookings
The system functions similarly to a library loan where you can return some books while keeping others checked out under the same loan, with intelligent tracking of each item's status across all active loans.
How Partial Check-ins Work
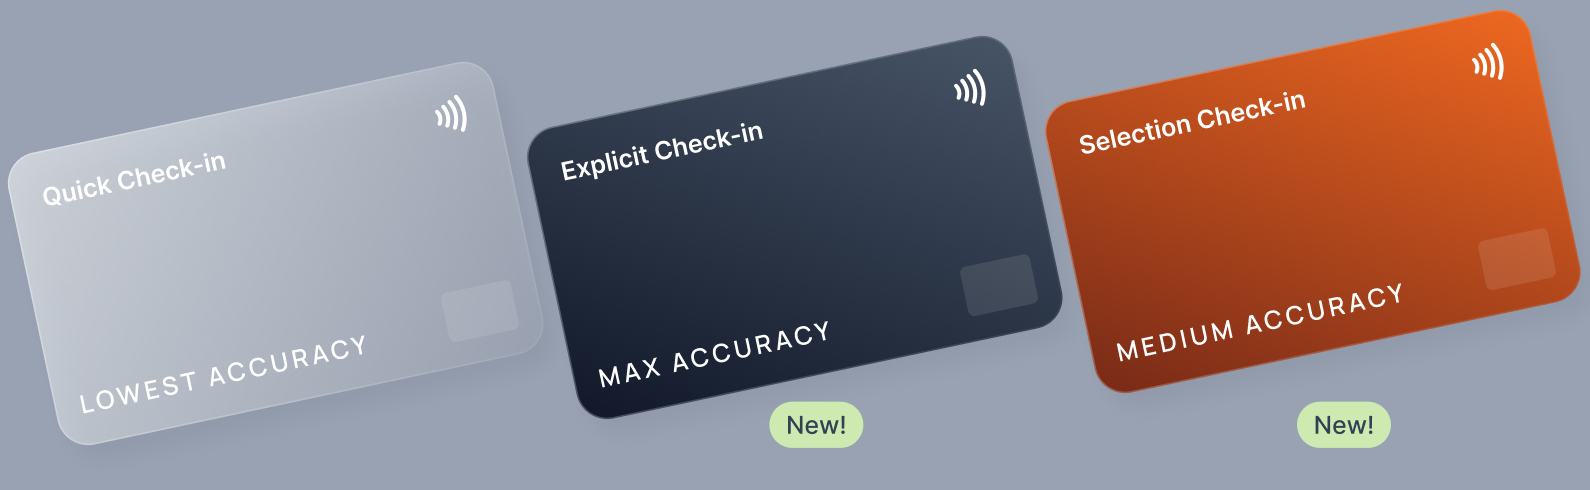
Three Ways to Perform Partial Check-ins
Quick Check-in (Dropdown)
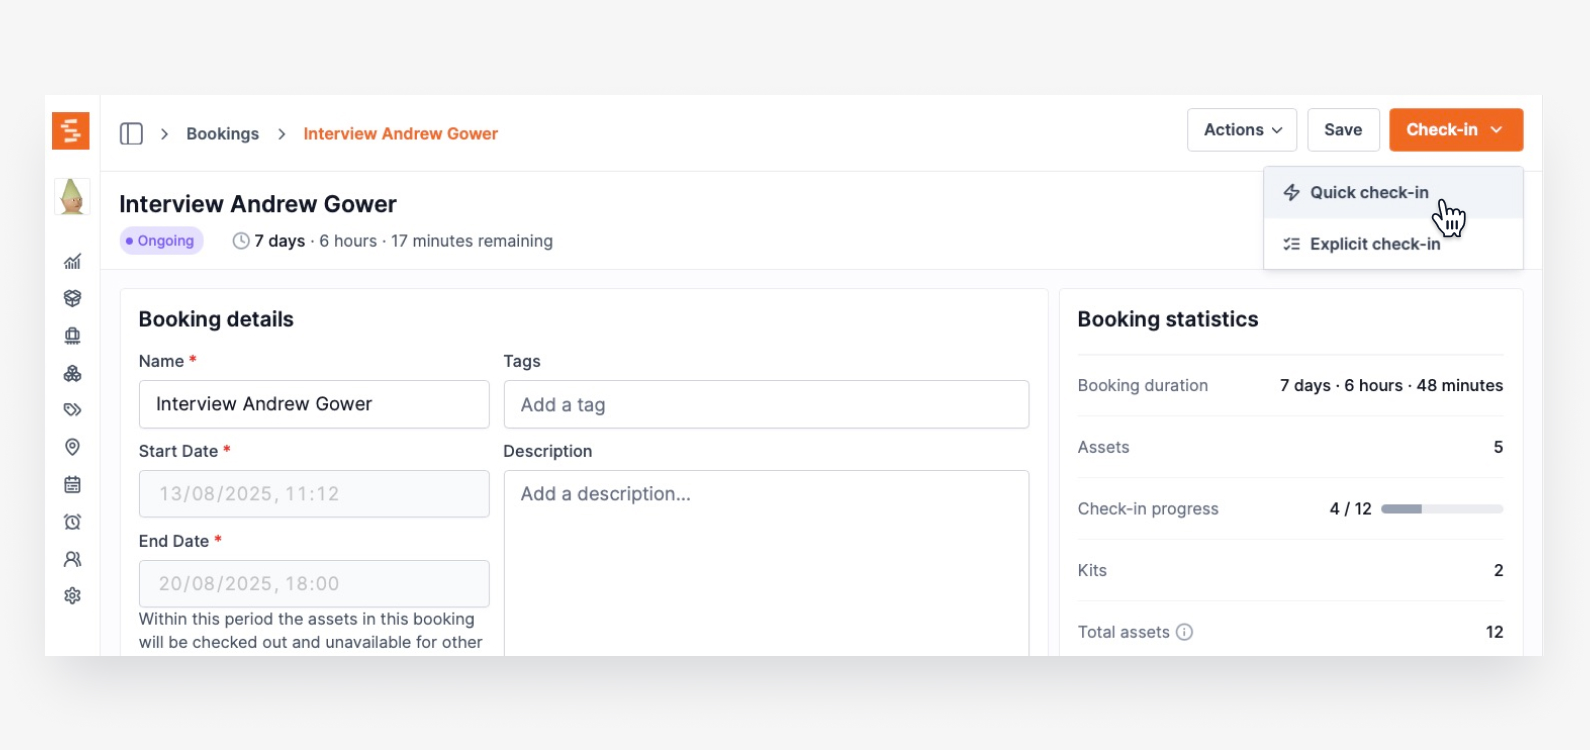
- Checks in all remaining assets at once (traditional method)
- Intelligently skips assets already checked in from previous partial sessions
- Use this when all remaining assets are being returned together
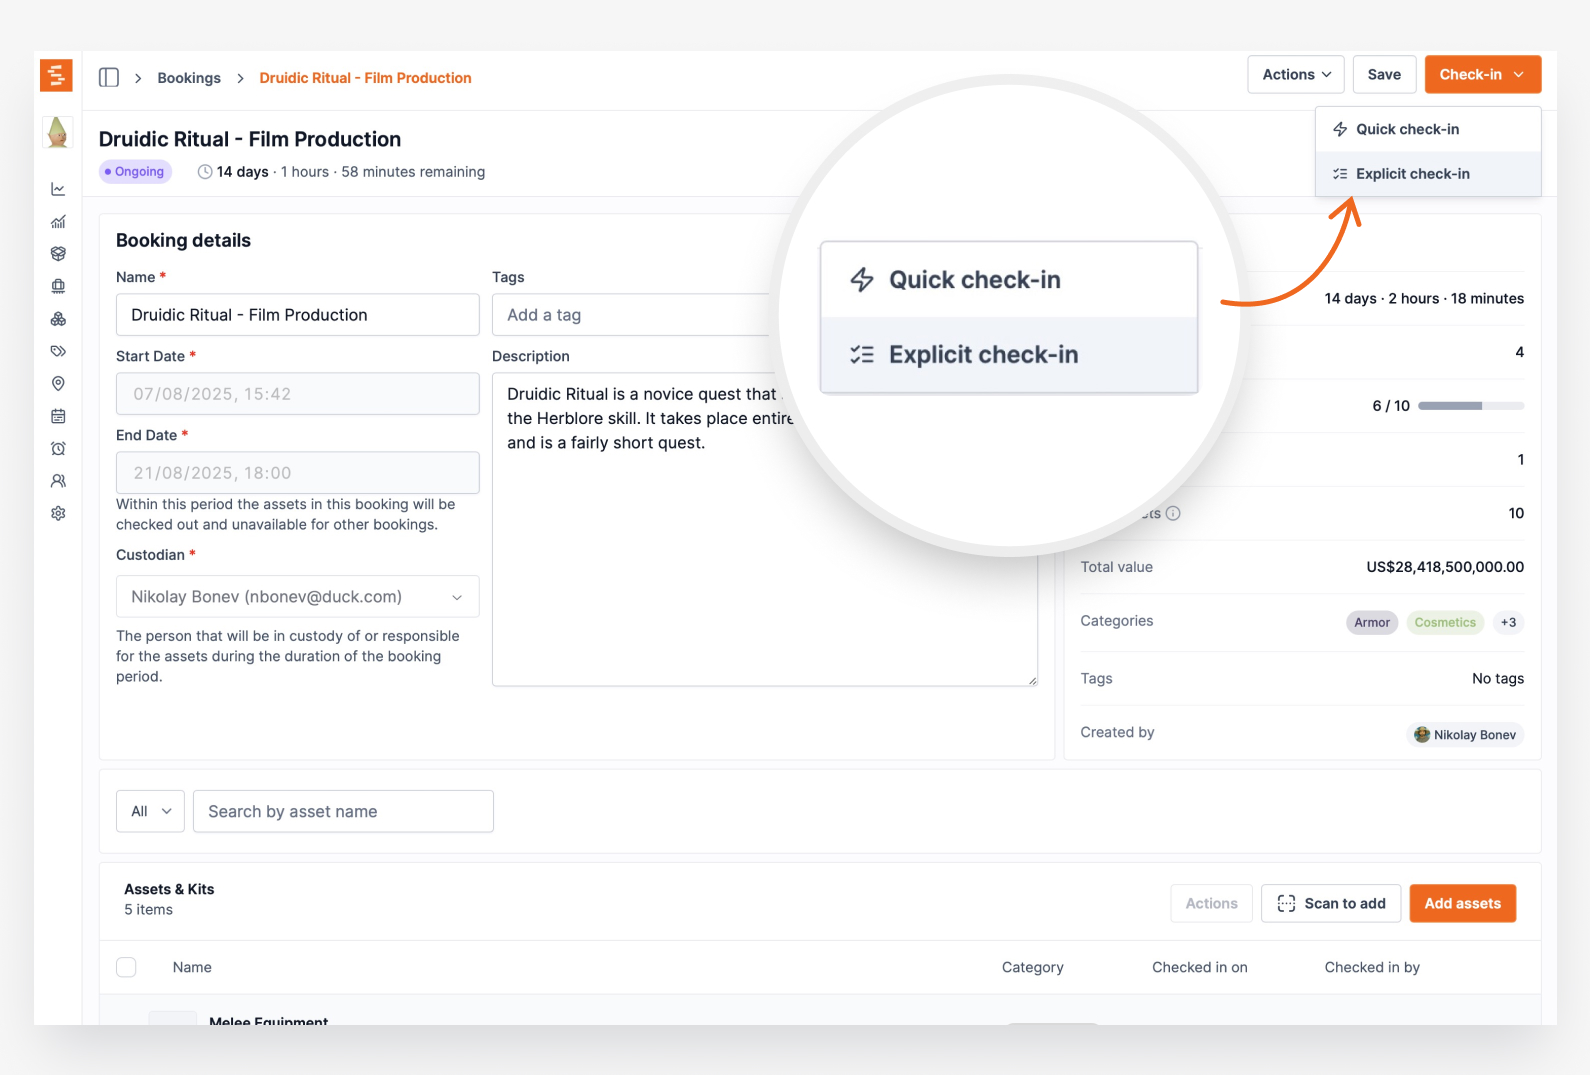
Explicit Check-in (Scanner)
- Opens a dedicated scanner interface for selective asset check-in
- Features real-time progress tracking and booking context
- Perfect for partial returns with physical verification of each item
- Mobile-optimized with responsive progress display
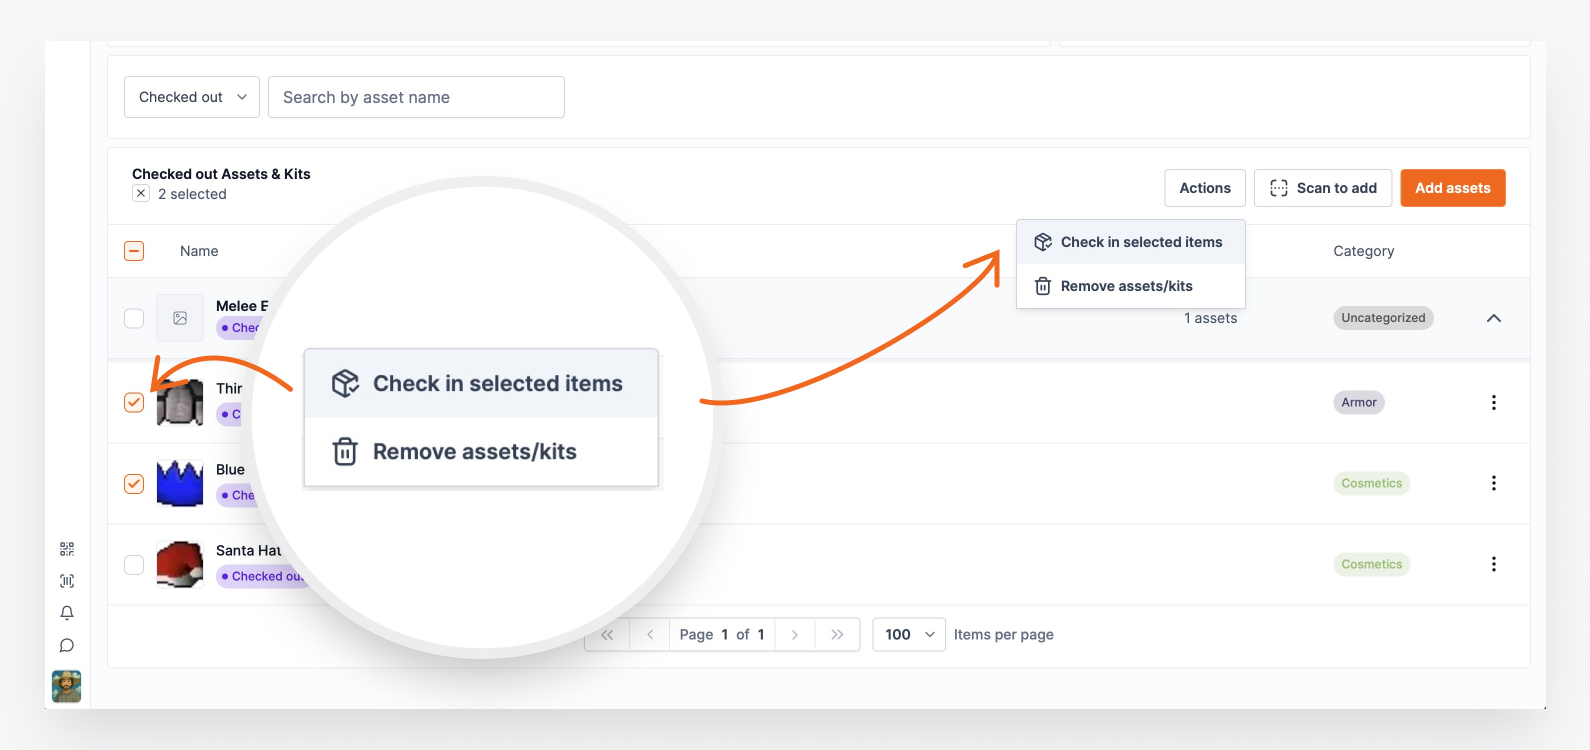
Bulk Selection (Actions Menu)
- Select specific assets from the booking list using checkboxes
- Choose Actions > Check in to process only the selected items
- Ideal when you want to check in specific assets without scanning
- Supports both individual assets and entire kits
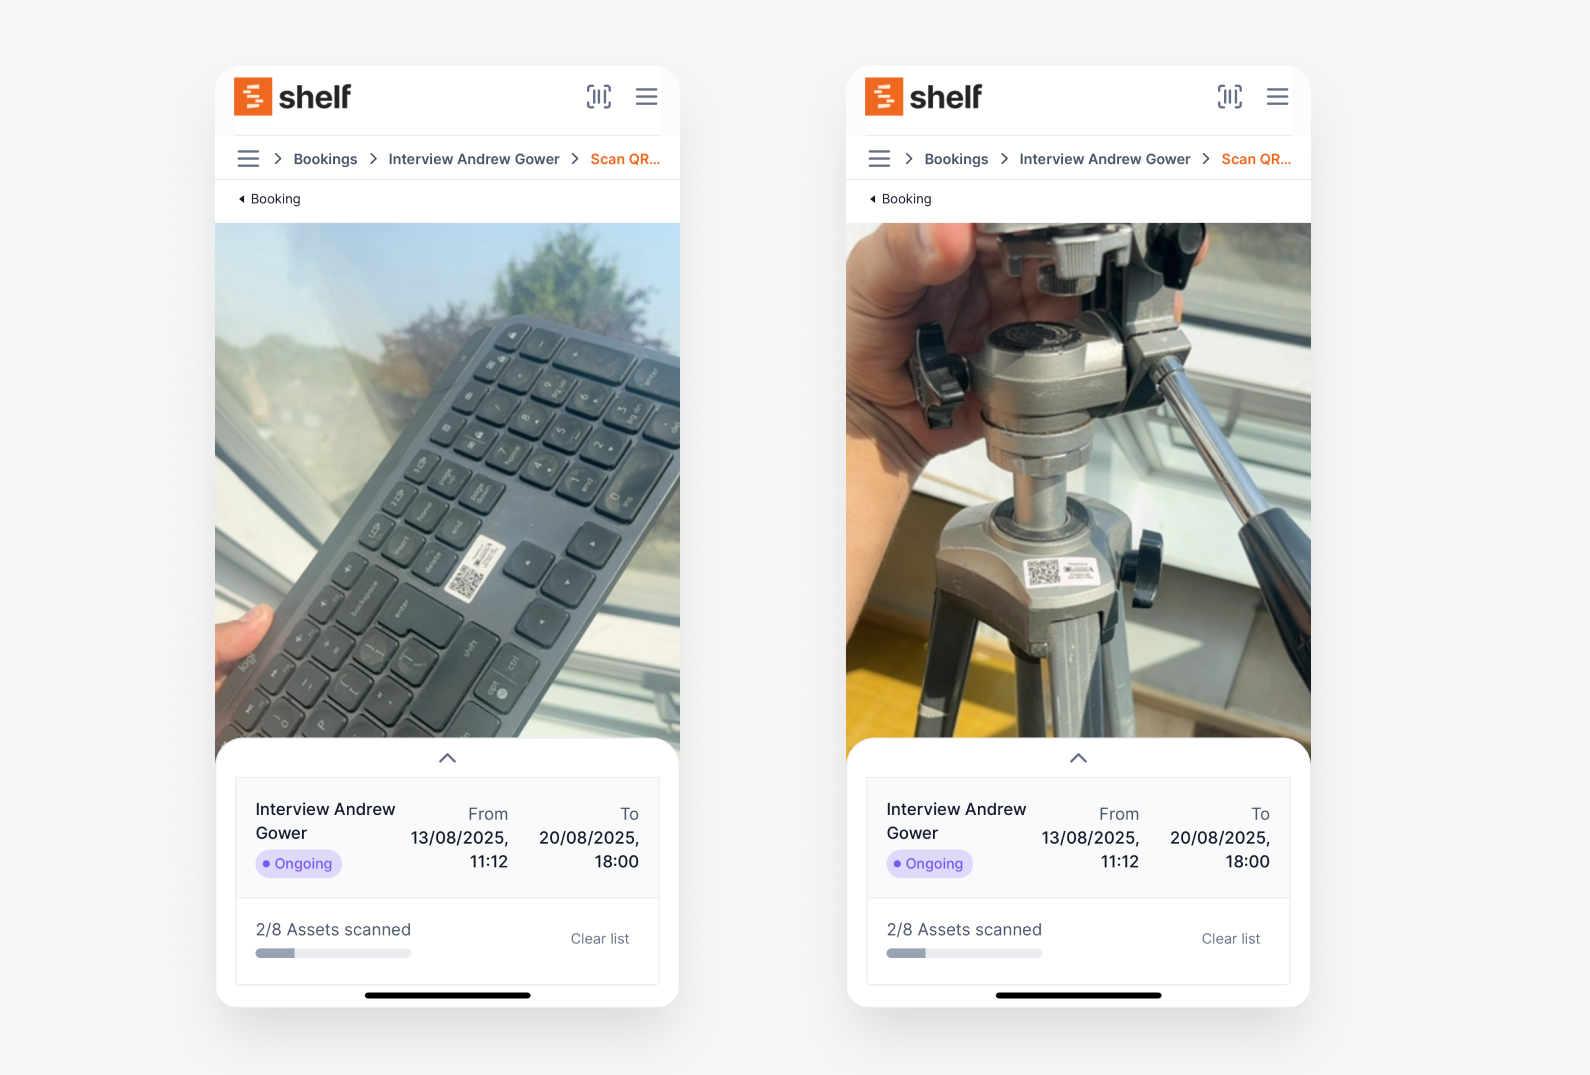
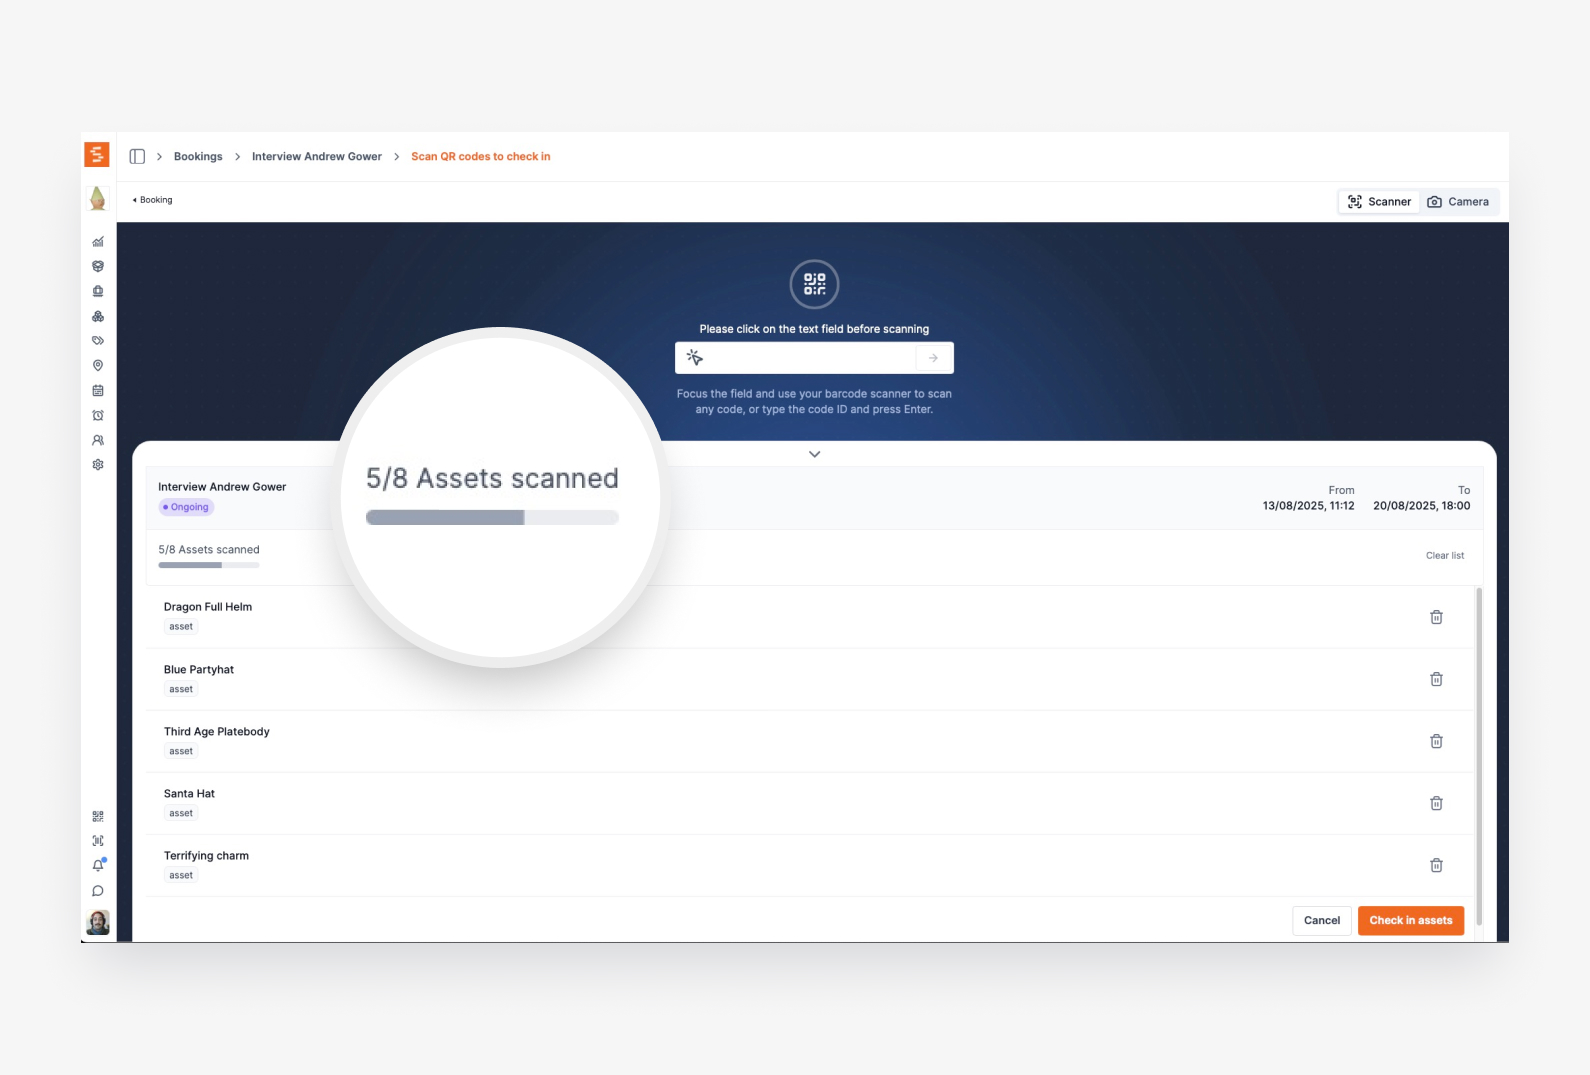
Using Explicit Check-in (Scanner Method)
- Access the scanner: Click "Explicit check-in" from the check-in dropdown
- Smart booking context: Scanner opens with booking details and progress bar at the top
- Scan returned assets: Use your device's camera to scan QR codes or barcodes
- Real-time validation: System validates each scan against booking contents and prevents conflicts
- Progress tracking: Watch the progress bar update with percentage completion
- Auto-completion: Booking automatically completes when last asset is scanned
Using Bulk Selection (Actions Method)
- View the booking: Navigate to the booking detail page
- Select assets: Check the boxes next to assets being returned
- Access Actions menu: Click the Actions dropdown in the toolbar
- Check in selected: Choose "Check in" from the Actions menu
- Confirm action: The selected assets will be checked in and marked as available
Bulk Selection Benefits:
- No scanning required -- perfect for damaged QR codes or when scanning is not practical
- Visual confirmation of exactly which assets you are processing
- Works with both individual assets and complete kits
- Instant processing without needing to navigate to scanner interface
Asset Status Intelligence
The system features context-aware status management that handles complex scenarios:
Multi-booking Asset States
- Assets can exist in multiple bookings simultaneously
- Status displays are context-aware based on which booking you are viewing
- An asset might be "Available" in one booking context but "Checked Out" in another
Smart Status Labels
- "Already checked in": Shows for assets that have been returned in active bookings
- "Available": Asset returned and ready for new bookings
- "Checked out": Asset currently in use in this booking context
How the Check-in Progress Bar Counts Kits
Once a booking has any progressive checkout or check-in activity, the simple check-in bar becomes a segmented Booked / Checked out / Returned lifecycle bar — gray for items still reserved, purple for items checked out, and green for items returned. The headline reads "Check-out progress" while items are still being handed out, then switches to "Check-in progress" once everything has left and you're tracking returns. The kit-counting behavior below applies to this bar in either phase. See Progressive Checkout for the checkout side.
The Check-in progress bar on a booking shows how much of the booking has been returned. By default it counts at the asset level — every asset is one item, including each asset inside a kit. For a booking built mostly from kits, that can be confusing: a single 30-piece camera kit reads as 30 separate items to check in, so "2 / 32" can look alarming when really only one standalone item and part of one kit are still out.
To make the progress bar match how people actually think about returns, a workspace can choose to count each kit as a single unit instead.
Counting modes
- Assets (default): Every asset counts individually. A kit with 30 assets contributes 30 to the total. The progress label reads "assets" with the note "All assets inside kits are counted individually."
- Kit as one unit: Each standalone asset counts as one item, and each kit counts as one item. A kit only counts as checked in once every asset inside it has been returned — a kit with some (but not all) of its assets back still counts as outstanding. The progress label reads "items" with the note "Kits count as one item."
In both modes the underlying check-in is identical — you still check in individual assets, and the per-asset list, scanner drawer, and CSV export always count assets individually. The setting only changes how the progress bar on the booking page tallies and displays its total.
Turning on kit-as-a-unit counting
This is a workspace-wide setting, so it applies to every booking. Only workspace Owners and Administrators can change it.
- Go to Settings > Bookings
- Find the Counting options card
- Turn on Count each kit as a single unit
The toggle saves automatically — there's no separate Save button. Switch it back off at any time to return to per-asset counting.
Best Practices
Choosing the Right Method
Use Explicit Check-in (Scanner) when:
- You need physical verification of each item
- Processing returns incrementally as they arrive
- Working with mixed kit returns
- QR codes are easily scannable
Use Bulk Selection (Actions) when:
- QR codes are damaged or hard to scan
- You prefer working from a visual list
- Processing specific items from paperwork or notes
- Quick selection of multiple items at once
Use Quick Check-in when:
- All remaining assets are being returned together
- Fast processing is priority
- You have verified all items are present
Continue Learning
Ready to dive deeper? Check out these related articles:
- Progressive Checkout — the checkout counterpart: hand booking items out one at a time as they're picked up.
- Availability View Complete Guide
- Bookings: How to Export Booking Information — the booking CSV export now includes per-asset check-in status, so you can report on exactly what's still out.
Need help getting started? Contact the support team or schedule a demo to see the complete partial check-in system in action with your specific use case and multi-booking scenarios.
Ready to try Shelf?
Put what you're learning into practice. Free plan available — no credit card required.